CoderFlow Bridge
CoderFlow Bridge lets an IBM i connect to a cloud-hosted CoderFlow instance without exposing any inbound ports or standing up any additional Linux or Windows infrastructure. The IBM i makes a single outbound connection to CoderFlow, and CoderFlow reaches the IBM i's services back through that one connection.
Use CoderFlow Bridge when CoderFlow is hosted in the cloud and cannot reach your IBM i directly — because of firewalls, NAT, or no inbound exposure. If you run CoderFlow on-premises with a network path to the IBM i, use a Direct connection instead (see IBM i Connections); CoderFlow Bridge is not needed.
CoderFlow Bridge connections are available only on CoderFlow instances hosted by Profound Logic on coderflow.ai. On self-hosted CoderFlow, IBM i connections always use Direct transport.
How It Works
CoderFlow Bridge opens one outbound SSH connection from your IBM i to the CoderFlow Bridge host. That single connection carries reverse port-forwards for the IBM i services CoderFlow uses. CoderFlow — and the task containers it runs — then reach your IBM i by connecting to those forwarded ports. Every CoderFlow IBM i feature works exactly as it does over a Direct connection.
  Your site (IBM i)                            CoderFlow (hosted on coderflow.ai)

 +--------------------------+                 +--------------------------------+
 | CoderFlow Bridge         |                 | CoderFlow Bridge host          |
 |   (ADDCONN)              |  outbound SSH   |                                |
 |                          |  ===========>   | Forwarded ports:               |
 | Local services:          |  (one tunnel)   |   22      -> OpenSSH           |
 |   OpenSSH        :22     |                 |   8240    -> Profound RAS      |
 |   Profound RAS   :8240   |  <===========   |   <port>  -> Profound UI Genie |
 |   Profound UI    :<port> |  CoderFlow      |                                |
 |                          |  connects back  | CoderFlow server and task      |
 |                          |                 | containers connect to the      |
 |                          |                 | forwarded ports as if they     |
 |                          |                 | were your IBM i                |
 +--------------------------+                 +--------------------------------+
Key properties:
- Outbound only. The IBM i initiates the connection. No inbound firewall rules or port forwarding are needed on your side.
- Resilient. The connection reconnects automatically if it drops, and — when configured to autostart — re-establishes itself after an IPL.
- Only the needed ports. Which ports are forwarded depends on the features enabled on the CoderFlow connection: SSH (for Build, SSH, and Sync), Profound RAS (for SQL), and Profound UI Genie (for Interactive Sessions). CoderFlow generates the exact port list for you.
System Requirements
- IBM i 7.4 or later.
- Outbound TCP connectivity from the IBM i to the CoderFlow Bridge host on the SSH port (default 22). Your firewall must allow this egress.
- A cloud-hosted CoderFlow environment with an IBM i connection configured to use CoderFlow Bridge. See Setting Up a CoderFlow Bridge Connection.
Required Authorities
| Action | Special authorities |
|---|---|
Install (CFINSTALL) | *ALLOBJ, *IOSYSCFG, *SECADM, *JOBCTL |
Manage connections (ADDCONN, CHGCONN, RMVCONN) | *ALLOBJ, *IOSYSCFG |
The Bridge connection jobs themselves run under the CODERFLOW user service profile that the installer creates. This profile cannot be used to sign into the system, has limited capabilities, and has no special authority.
Installed Components
A single installation handles as many connections as you need, so there is normally no reason to customize it, and most users should install with the defaults. If you do have a specific reason to change the names or locations below — for example, a default library name is already in use on the system — specify ADVANCED(*YES) when running CFINSTALL, prompt the command with F4, and read the command's help (the panel group) for details on each setting.
By default, CFINSTALL installs the components below.
| Component | Default name | Purpose |
|---|---|---|
| Library | CODERFLOW | Holds the commands and supporting objects |
| User profile | CODERFLOW | Owns the objects and runs the Bridge jobs |
| Subsystem description | CODERFLOW | The Bridge connection jobs run here |
| Commands | ADDCONN, CHGCONN, RMVCONN | Add, change, and remove connections |
| TCP server special value | *CFBRIDGE | Start and stop connections with STRTCPSVR / ENDTCPSVR |
| IFS directory | /coderflow | Bundled OpenSSH, plus per-connection configuration, keys, and logs |
Installing
Install CoderFlow Bridge from a TN5250 session (IBM i Access Client Solutions or another 5250 emulator) using a profile that has the required authorities.
CoderFlow presents these installation steps in a guided wizard during Essentials onboarding or setup through the Connections dialog.
Installing ends all active CoderFlow Bridge connections. Connections configured to autostart are restarted automatically once the install completes.
Download and prepare
Run the CL commands below at an IBM i command line in a 5250 Emulator session.
-
Download cfinstall.savf to your computer. Save it in an easy-to-find folder, such as Downloads, and keep the filename
cfinstall.savf. -
Create a new, empty library to hold the save file and installer objects:
CRTLIB LIB(CFINSTALL)These instructions use
CFINSTALL. If that library already exists, choose another new library name, or delete and recreate it only after confirming its contents are no longer needed. If you choose another name, substitute it in the destination path and library parameters below; keep the save-file and installer object nameCFINSTALL.
Transfer the installer save file
Transfer the downloaded cfinstall.savf into the CFINSTALL library using a method of your choosing, such as FTP, SFTP, or IBM i Access Client Solutions (ACS).
The detailed steps below use ACS. Have your IBM i system configured in ACS and your sign-in details ready. With ACS, upload directly to the installer library using the Integrated File System tool; you do not need to create a separate IFS folder or pre-create a save-file object.
-
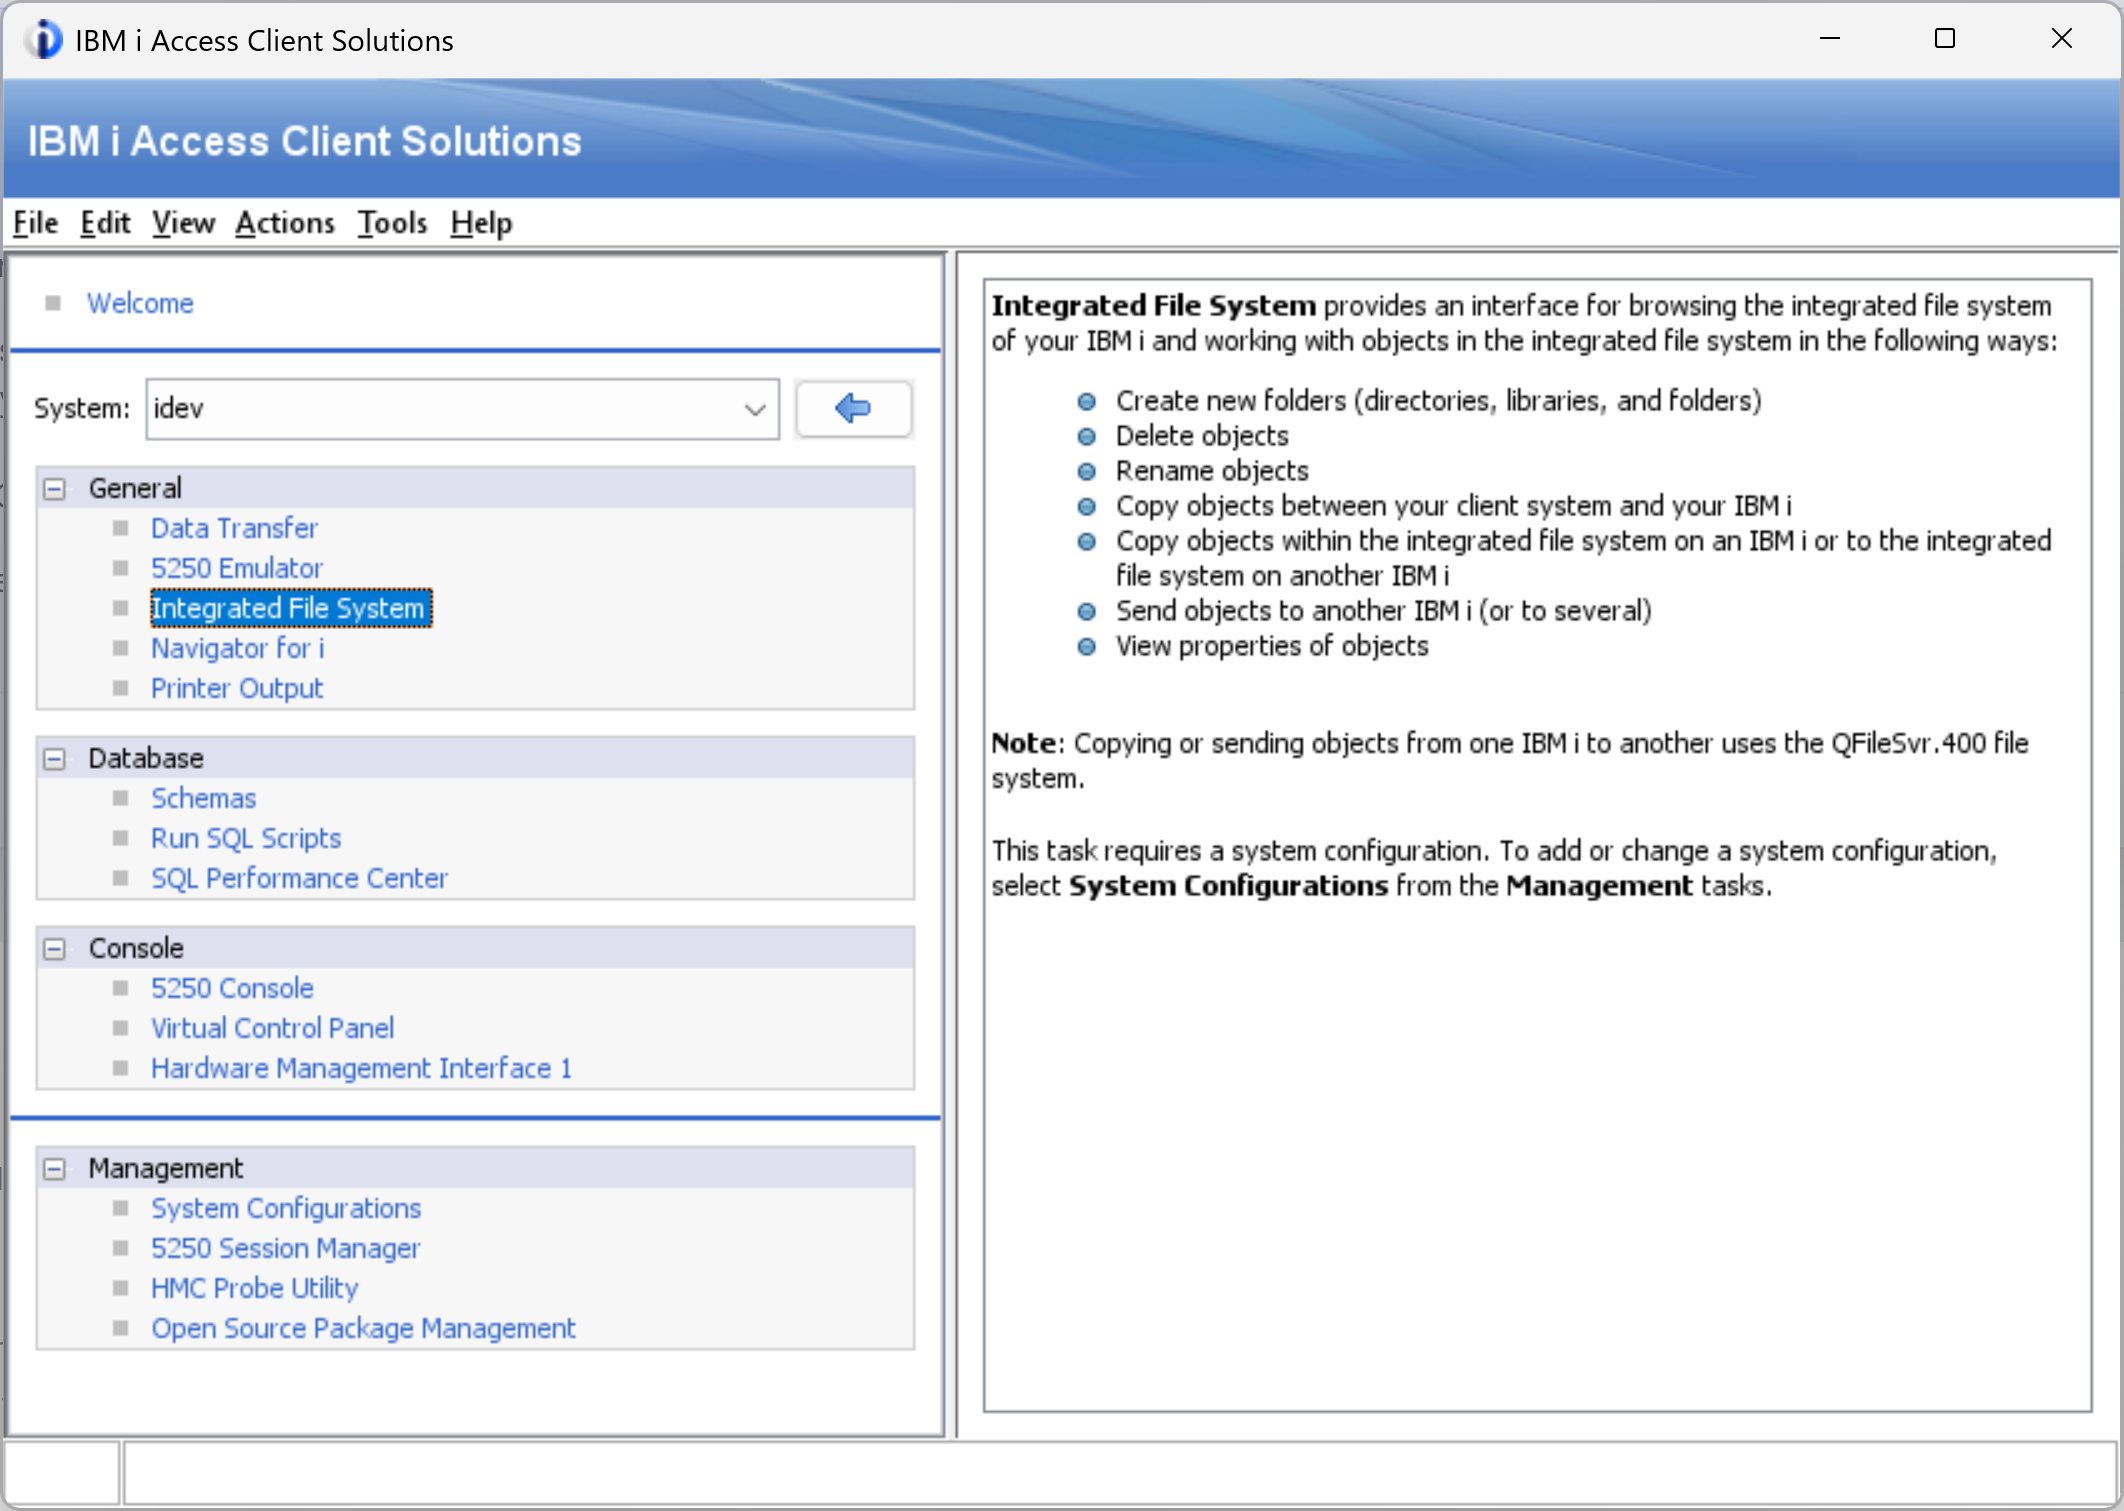
Open Integrated File System. In the ACS main window, select your IBM i in the System dropdown, then open Integrated File System under General. Sign in if prompted.
-
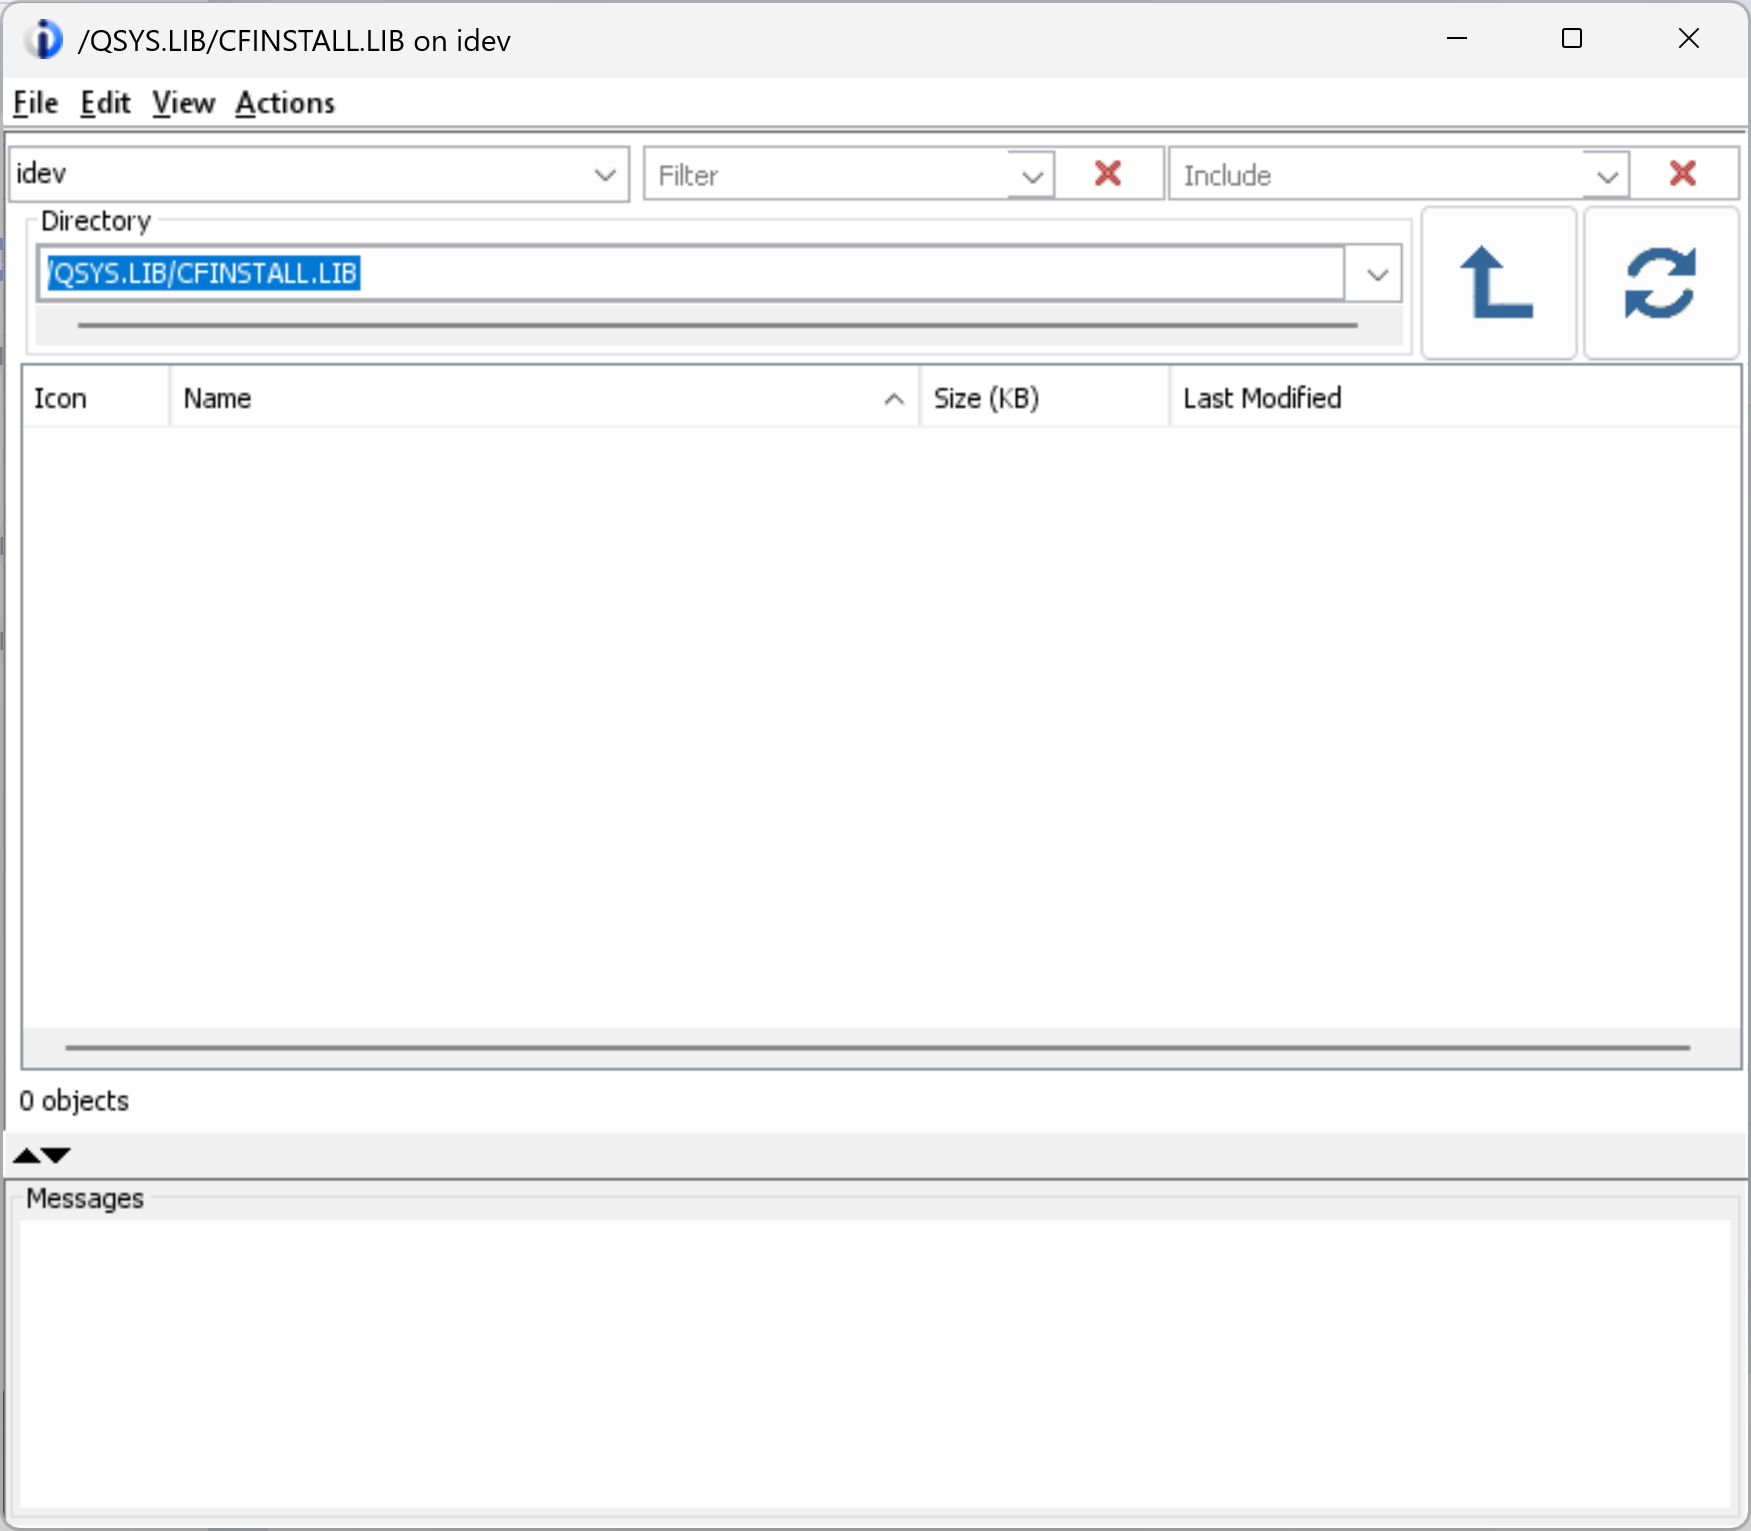
Set the destination. In the Directory field, enter the following path and press Enter:
/QSYS.LIB/CFINSTALL.LIBThis is the library you created in the previous section. Its object list should be empty. If ACS cannot find the path, confirm that you selected the correct IBM i system and created the library there.
-
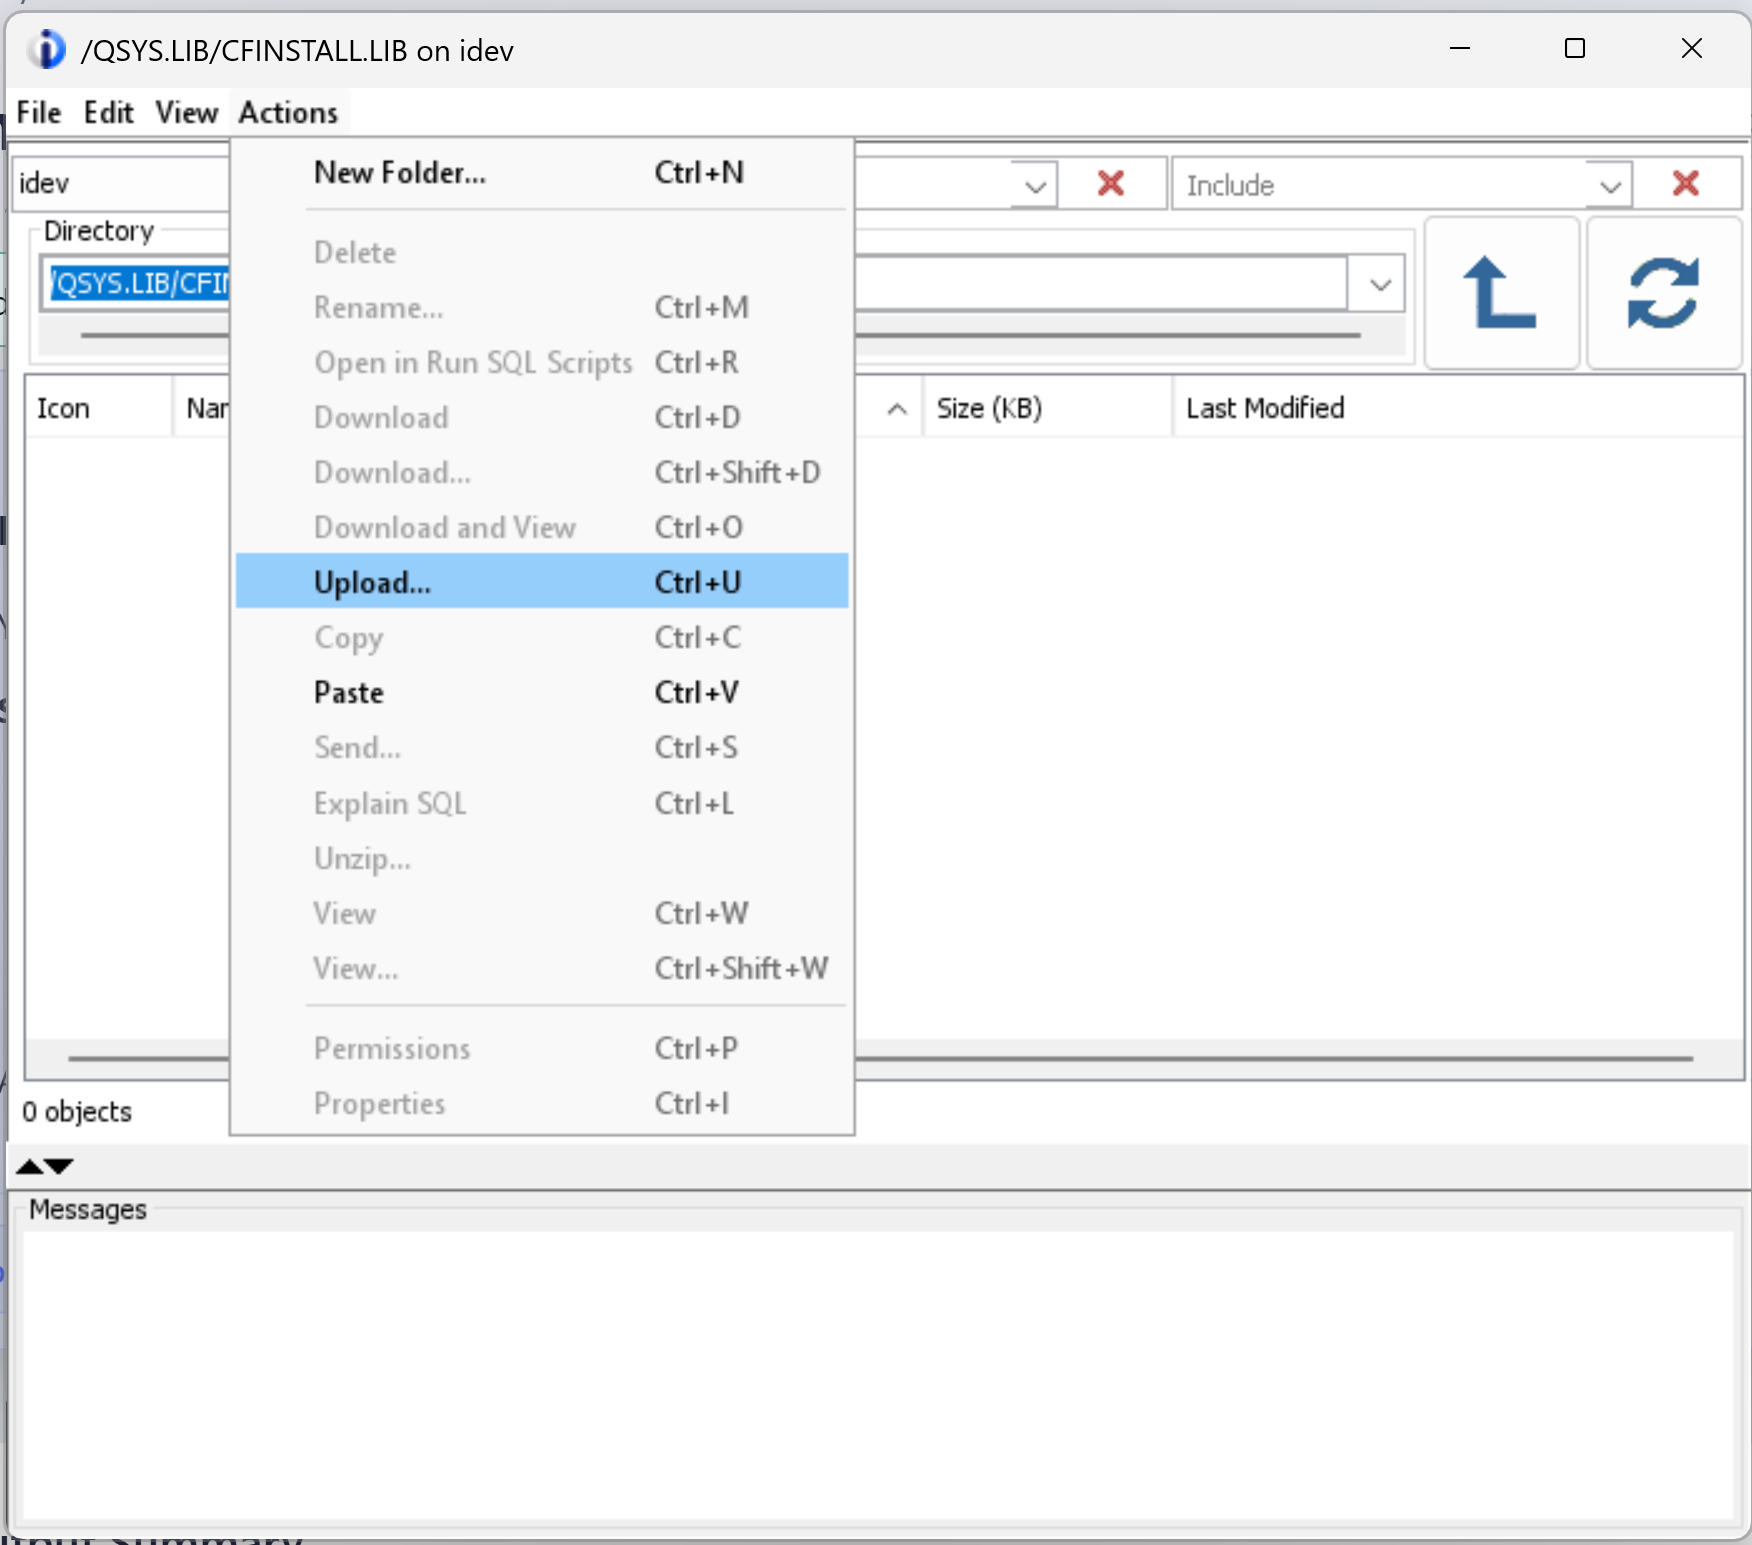
Choose Actions → Upload…
-
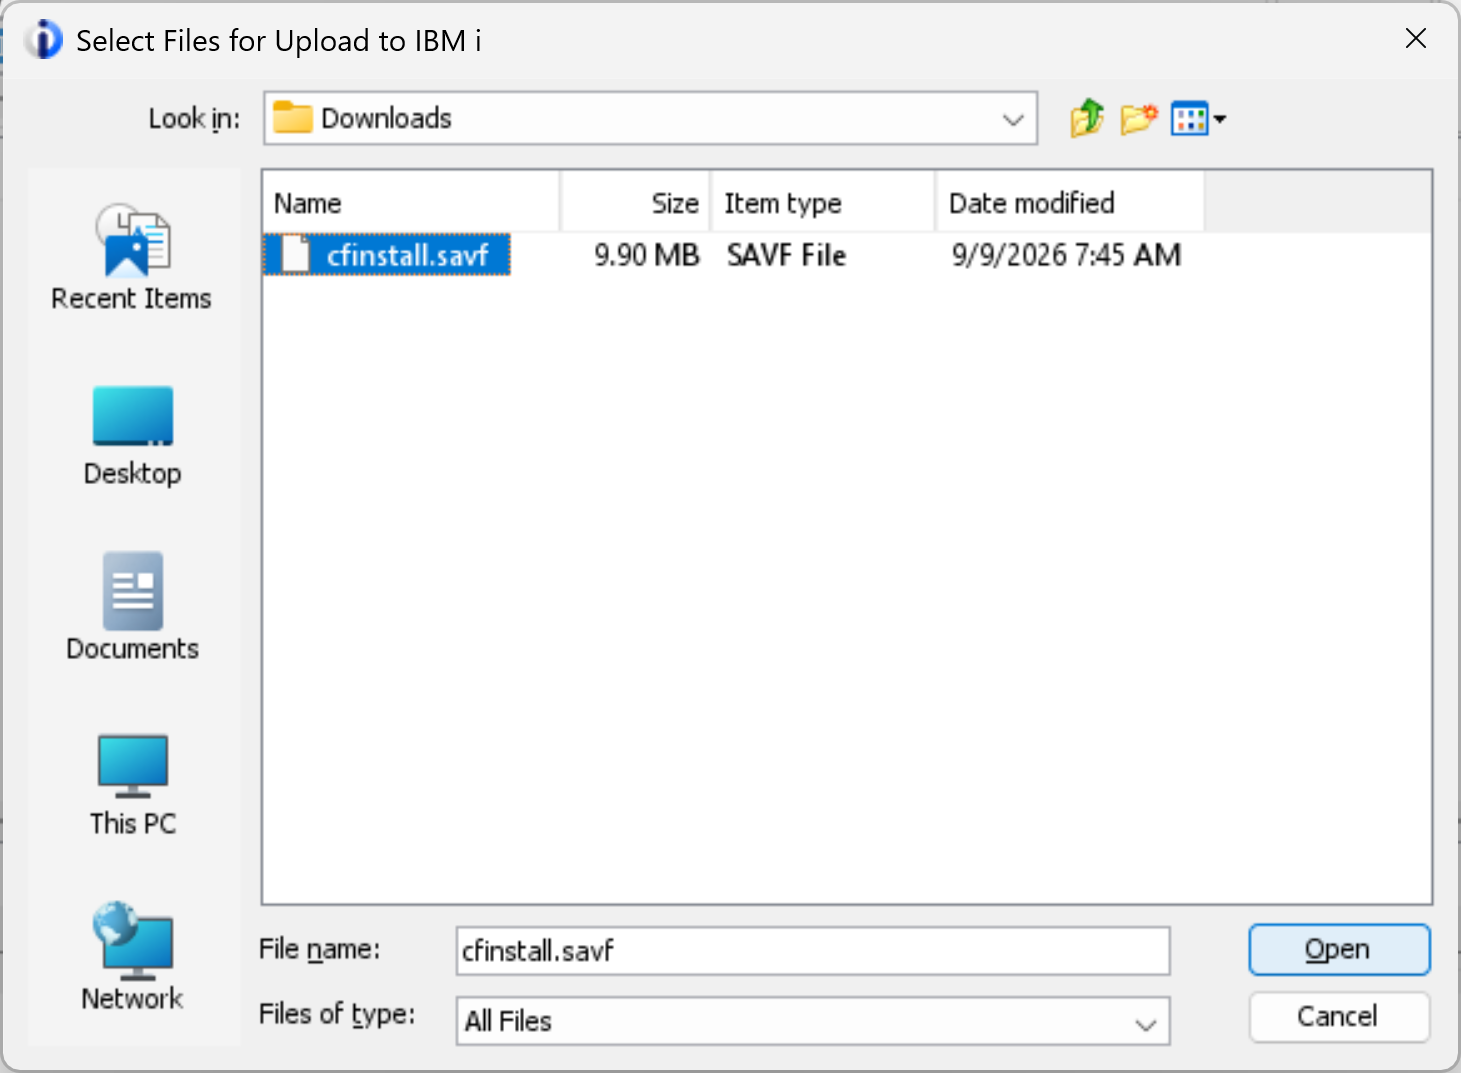
Select the downloaded file. Browse to Downloads (or the folder where you saved the file), select cfinstall.savf, then click Open.
-
Confirm the upload. Check that the dialog lists
cfinstall.savfand destination/QSYS.LIB/CFINSTALL.LIB, then click OK. The Replace existing file option permits overwriting an existing file with the same name. It is not needed for a new, empty library; clear it unless you intend to replace a previous installer save file.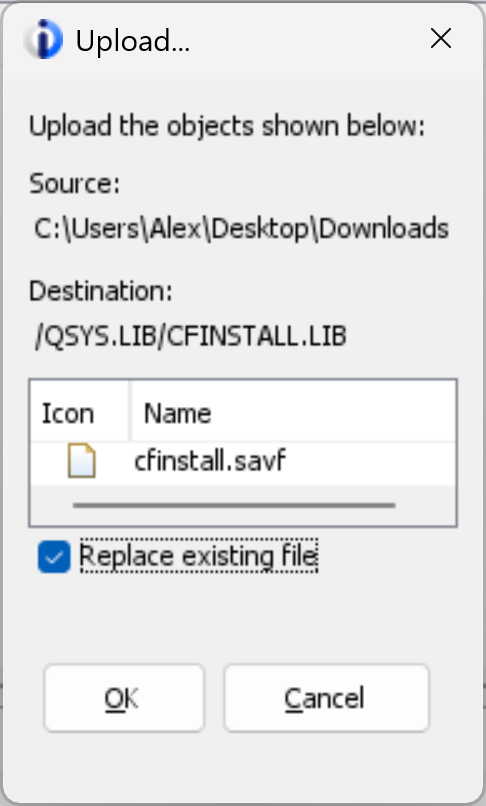
-
Wait for completion. ACS displays a Download and Upload Status window while the file transfers.
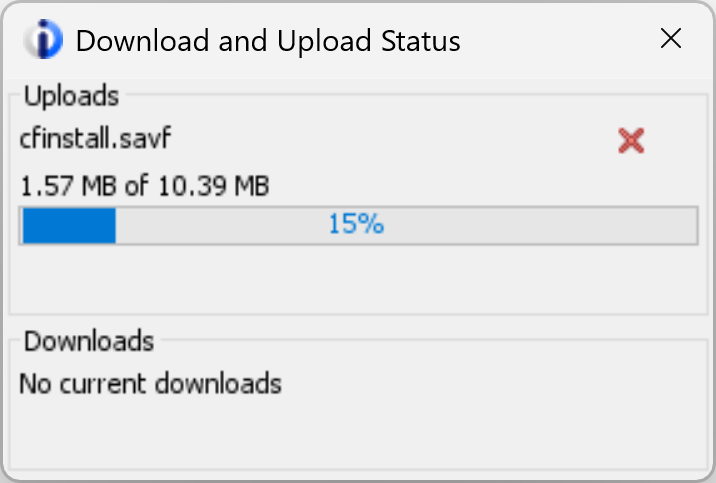
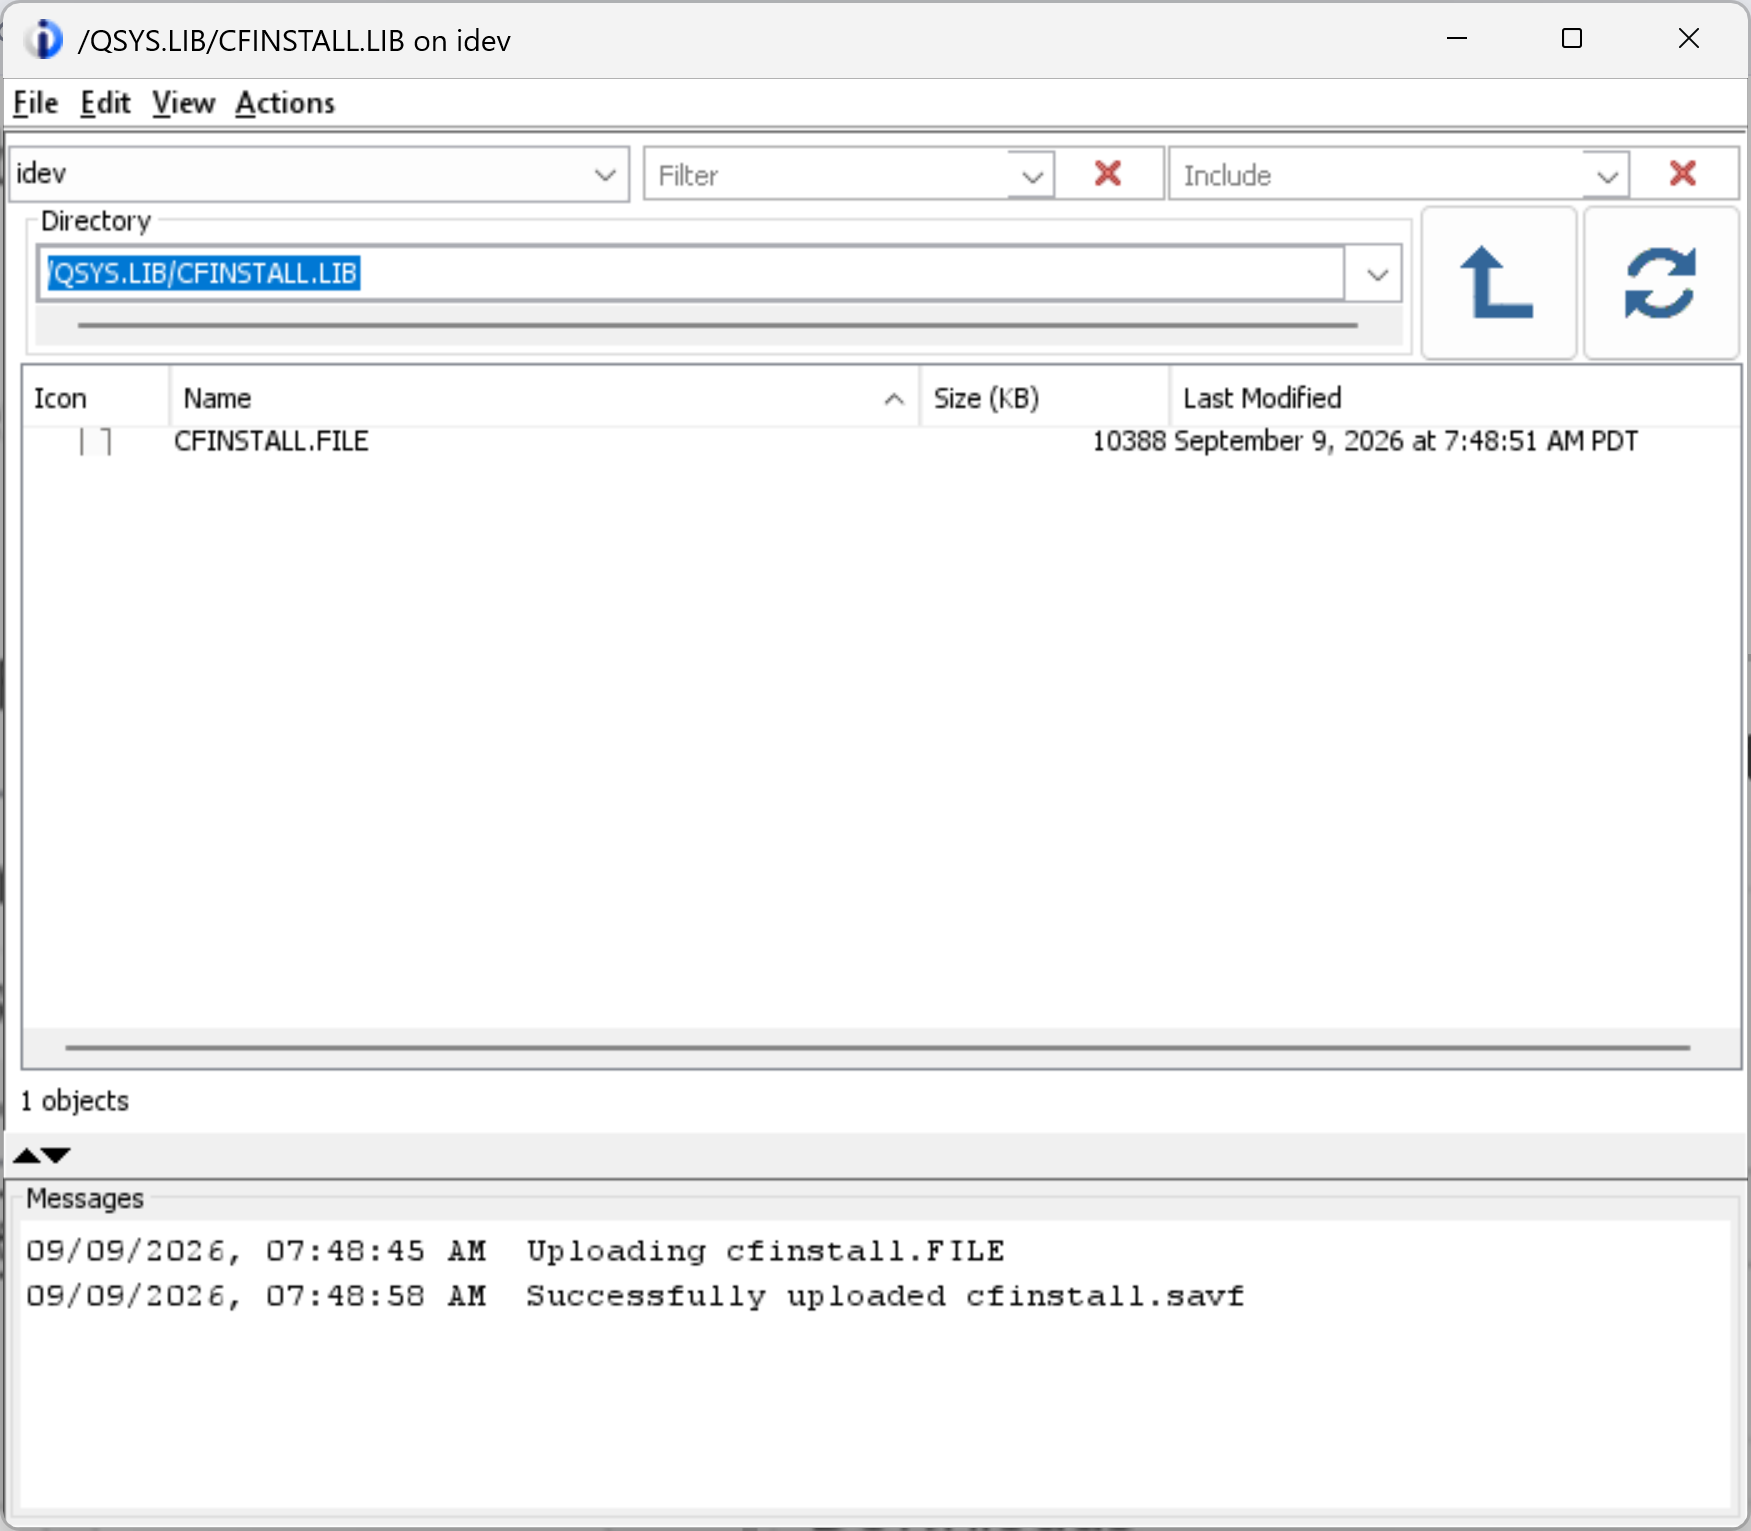
When the transfer finishes, look for Successfully uploaded cfinstall.savf in the Messages area of the Integrated File System window. The object list shows CFINSTALL.FILE.
Restore and install
-
Restore the
CFINSTALLinstaller objects from the save file.SAVLIB(QTEMP)is the library name recorded inside the save file;RSTLIB(CFINSTALL)is your destination library. AdjustRSTLIBand the library part ofSAVFif you chose another library name.RSTOBJ OBJ(CFINSTALL) SAVLIB(QTEMP) DEV(*SAVF) SAVF(CFINSTALL/CFINSTALL) RSTLIB(CFINSTALL)The completion message is X objects restored from QTEMP to CFINSTALL, where X is the number of objects restored. If the restore reports an error, resolve it before continuing.
-
Set your user library list to the installer library. Run this and the remaining commands in the same 5250 session.
CHGLIBL LIBL(CFINSTALL) -
Install by running the
CFINSTALLcommand.CFINSTALLWait for CFI9999 — "CoderFlow Bridge installation complete." See Verifying the Installation if the installer reports a problem.
-
Clean up after a successful installation. Remove the temporary installer library from your library list, then delete it:
RMVLIBLE LIB(CFINSTALL)DLTLIB LIB(CFINSTALL)
Verifying the Installation
On success, CFINSTALL issues the completion message CFI9999 — "CoderFlow Bridge installation complete."
If there is any problem, CFINSTALL issues an error message describing it, and a copy of the job log is printed to a spooled file. If the cause and solution are not clear from the message, review the job log for more details.
Once you have configured a connection, confirm it shows as live in the CoderFlow connection list (see Connection status).
On the IBM i, you can also see the connection running with WRKACTJOB on the Bridge subsystem:
WRKACTJOB SBS(CODERFLOW)
Each active connection runs as two jobs in the subsystem:
- a manager job that monitors the connection, handles its logging, and restarts it if it drops; and
- the SSH connection job that carries the tunnel itself.
The example below shows both jobs for an active connection — the manager job (PGM-cfbridge) and the SSH connection job (PGM-ssh) — running in the CODERFLOW subsystem:

Troubleshooting Connections
Each connection keeps its own files under the installation directory, in connections/<connection-name>/. The connection's log is written to:
/coderflow/connections/<connection-name>/logs/out.log
If you installed into a non-default directory, substitute that directory for /coderflow.
The log is the first place to look when a connection won't come up or keeps dropping. The manager job records the connection's lifecycle there — when it starts and stops, each reconnect attempt, and authentication failures — along with the output of the SSH client itself.
Two common problems:
- The connection won't authenticate. The public key on the IBM i must match the key stored on the connection in CoderFlow. Regenerate and re-paste it with
CHGCONN CONN(<name>) KEY(*REGEN)(see CHGCONN). - The connection never establishes. Confirm the IBM i can reach the CoderFlow Bridge host outbound on the SSH port (default 22); your firewall must allow that egress.
Starting and Stopping Connections
Each connection runs as one instance of the *CFBRIDGE TCP server. In the commands below, replace CODERFLOW with the connection name.
Start all connections:
STRTCPSVR SERVER(*CFBRIDGE)
Start a single connection:
STRTCPSVR SERVER(*CFBRIDGE) INSTANCE(CODERFLOW)
End all connections:
ENDTCPSVR SERVER(*CFBRIDGE)
End a single connection:
ENDTCPSVR SERVER(*CFBRIDGE) INSTANCE(CODERFLOW)
A connection created with AUTOSTART(*YES) (the default) starts automatically when TCP/IP starts, so it survives an IPL.
Managing Connections
You normally run these commands by copy-pasting the ready-made command that the CoderFlow Bridge setup wizard generates. They are documented here for reference and advanced use. All three require *ALLOBJ and *IOSYSCFG.
ADDCONN — Add a Connection
Configures and starts a connection, generates its keypair, and displays the public key for you to paste into CoderFlow.
| Parameter | Description |
|---|---|
CONN | Connection name. Identifies the connection's jobs and its configuration. Required. |
DEST | Destination address, entered exactly as shown in CoderFlow's setup wizard. Required. |
FWD | One or more (remote-port local-port) pairs, as shown in the setup wizard. Required. |
AUTOSTART | *YES (default) starts the connection when TCP/IP starts; *NO does not. |
REPLACE | *NO (default) reports an error if the connection already exists; *YES removes and recreates it, including all configuration, keys, and logs. |
ADDCONN CONN(CODERFLOW) DEST('cfbridge-abc@bridge.example.coderflow.ai')
        FWD((50000 22) (50001 8240) (50002 8080))
ADDCONN displays the new public key and waits. After you paste the key into CoderFlow, press Enter on that screen to start the connection.
CHGCONN — Change a Connection
Changes an existing connection and restarts it. Parameters left at *SAME are not changed. Use it when CoderFlow tells you the forwarded ports changed, or to rotate the key.
| Parameter | Description |
|---|---|
CONN | Name of the existing connection. Required. |
DEST | New destination, or *SAME to leave it unchanged. |
FWD | New forward set. Any value you specify replaces all existing forwards; omit it to leave them unchanged. |
AUTOSTART | *YES, *NO, or *SAME. |
KEY | *SAME keeps the existing keypair; *REGEN generates a new one and displays the new public key. The connection will not authenticate until the new key is in place in CoderFlow. |
CHGCONN CONN(CODERFLOW) FWD((50000 22) (50001 8240) (50002 8081))
CHGCONN CONN(CODERFLOW) KEY(*REGEN)
RMVCONN — Remove a Connection
Completely removes a connection, including all of its configuration, keys, and logs.
RMVCONN CONN(CODERFLOW)
Uninstalling
There is no single uninstall command; remove the installed components manually. Run the following from a profile with the same authorities used to install. If you installed with ADVANCED(*YES) and custom names, substitute your own values.
ENDTCPSVR SERVER(*CFBRIDGE)              1. End all connections
RMVTCPSVR SVRSPCVAL(*CFBRIDGE)           2. Remove the TCP server special value
ENDSBS SBS(CODERFLOW)                    3. End the subsystem
DLTLIB LIB(CODERFLOW)                    4. Delete the library (commands, subsystem, job queue/description, class, data area)
RMDIR DIR('/coderflow') SUBTREE(*ALL)    5. Remove the IFS directory (also removes every connection's config, keys, and logs)
DLTUSRPRF USRPRF(CODERFLOW)              6. Delete the user profile